

We moved!
Check us out at http://www.honeycornfarm.com. We’re in the process of moving the content from this site to the new one, but we’ll have new content soon!
Check us out at http://www.honeycornfarm.com. We’re in the process of moving the content from this site to the new one, but we’ll have new content soon!

Alright, so I’m guessing you’ve already discovered this project is just a shameless ploy to get you to look at my cute puppy. But, I mean look at him! His name is Tug, and we’re best bros. Still, a dog bed is a pretty easy/quick project for beginning woodworkers. Since I planned on painting this project, I decided to use top choice whiteboard. These are the boards looked over during the select wood process, due to their containing knots and other imperfections. They’re perfect for building material that will be covered up with paint. I came up with the dimensions to match a dog pillow bed. Then basically made a mitered picture frame, and cut out portions of the middle to give the look of legs. I used a round over bit to soften the edges around the bottom of the piece. just to give it a little more character. And get this… the mitered corners come together to make… wait for it… little hearts. After some sanding, I threw on a few coats of red …

Not a long post this week, just some shots of a walnut razor I turned on the lathe. I keep forgetting to take progress pics when turning. There’s not really many steps involved like making furniture. I also don’t take many breaks, since it’s a continuous project. Maybe that’s why most wood turners are on YouTube. Oh well, hope you enjoy.

I started out this week’s project with the intent of making a padauk and walnut box. However, my plans were thwarted at the last moment by my router. I ended up leaving off the top, and adding a divider. The result… the Gentleman’s Caddy. I had plenty of padauk and walnut lying around the shop, so I cut all my pieces for the glue up. I glued up the boards and clamped them in a matching pattern. Since I was going to run these pieces through the planer, I wasn’t worried about cutting them to the same length. I haven’t made a planer sled, so I usually have to cut the ends off from snipe. I cut the boards to length using my miter saw, at a 45 degree angle. This isn’t a very large piece and won’t be used to hold a lot of weight, so I didn’t worry about using splines. I cut a rabbet with my router table, and inserted a piece of backer board for the bottom. I created the …

I received an unexpected surprise this week. My Step-Father brought over some wood he’d been keeping in his shop for the last 40 years or so. This wood belonged to a friend of his that past away. I didn’t have a lot of material to work with, but I decided I wanted to make something nice out of it. Something of an heirloom, to pass down, just as it had been passed to me. The cedar had darkened quite a bit over the years, but came back to life after a few passes through the planer. I cut the boards for the top, and joined them together with a biscuit joiner. I wanted the overall look to be rustic, so I didn’t worry about milling out any knot’s or holes. I cut the legs into 1.5″ strips, and glued them together. I squared them up by running them through the jointer and planer. I created a jig to taper the legs, and ran them through the table saw. This is the first time I’ve tried these …

This week, I made a simple wooden bottle opener. I recessed two magnets into the back to catch the bottle caps after opening, which really adds to the functionality of it. I used scrap cedar and pine from around the shop to make this piece, but you can use anything you have available. I glued the pieces together and let them dry. After about an hour, I took them over to the miter saw, and cut off the edges. Now that my boards have nice clean edges, it’s time to clean up the gaps on the face with my planer. The planer is my new favorite piece of equipment lately. No matter how messy the glue up is, the planer shaves it down nicely. One of the best tips I learned, was to use “Waste Stock” around your work pieces when cutting, to avoid tear out. Here I’ve surrounded my work piece with MDF. It really creates much cleaner edges than from sawing alone. I’ve also used masking (or painter’s tape) when cutting, but I usually …
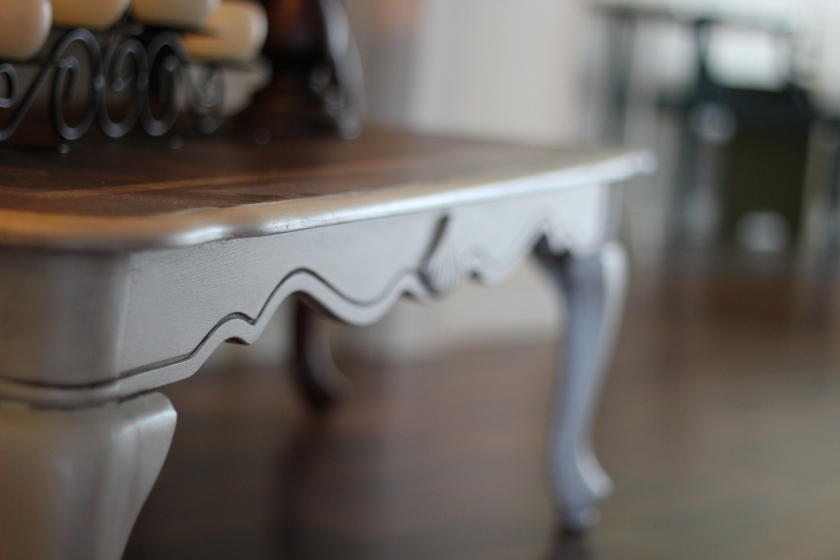
Things used on this project: 60 Grit sand paper MinWax Dark Walnut Stain Home Made Polyurethane Burnt Almond Valspar Paint (chalk paint supplies) Natural hair paint brush (optional) Antiquing Glaze This is a coffee table that has been sitting in our attic for seven years. It is a typical coffee table that you would find in any furniture store, and I for the life of me have no idea where we picked it up. Ever since we started refinishing and painting furniture I have been wanting to get my hands on this thing. First things first, getting this table down from the attic which was not easy since the staircase is EXTREMELY narrow and it is kind of heavy. So that was fun. 🙂 Then sanding. I used a 60 grit sand paper with an orbital sander. This is a veneer top table and a very HEAVY layer of poly. So………four sanding pads and two and half days later this beautiful top was under all that dark stain! Once the top was clean and …
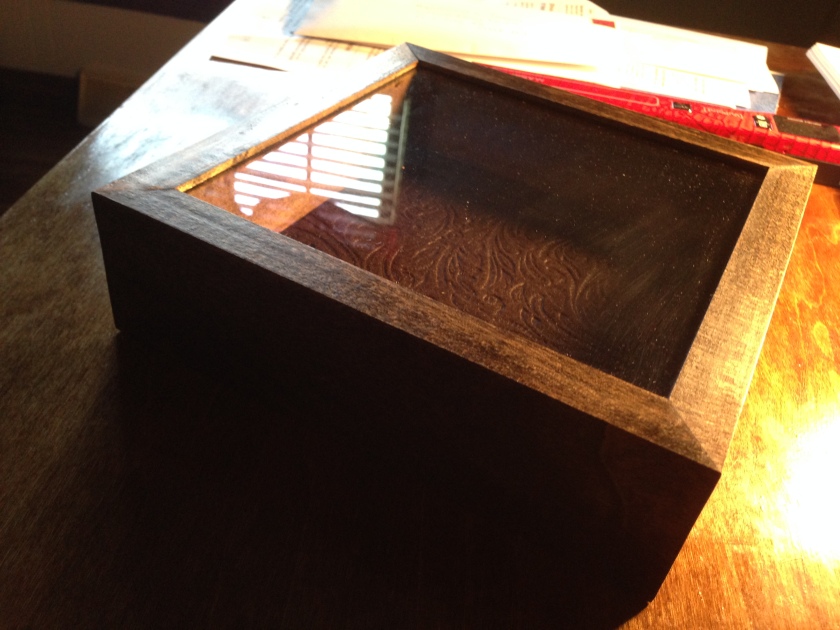
Our son recently got a rock tumbler, and needed something to display his finished rocks. So we made a shadow box to put them in. I’ve never worked with glass before, so I was really excited to try this out. I’m making the shadow box out of left over poplar boards from the table top redux. This will make good use of otherwise scrap wood, and save us some money too. I used the table saw to cut the boards down to the height I wanted the box to be. Then I used the router to route out groves that will hold the glass and base. I used the miter saw to cut the ends at 45 degrees. Since I always have trouble with spill out, I decided to stain the boards before glueing them together. I stained the boards with Minwax Dark Walnut stain, and let them dry overnight. The next day, I cut the plexiglass to the size I needed with a razor blade. I inserted the glass into the top groves and …
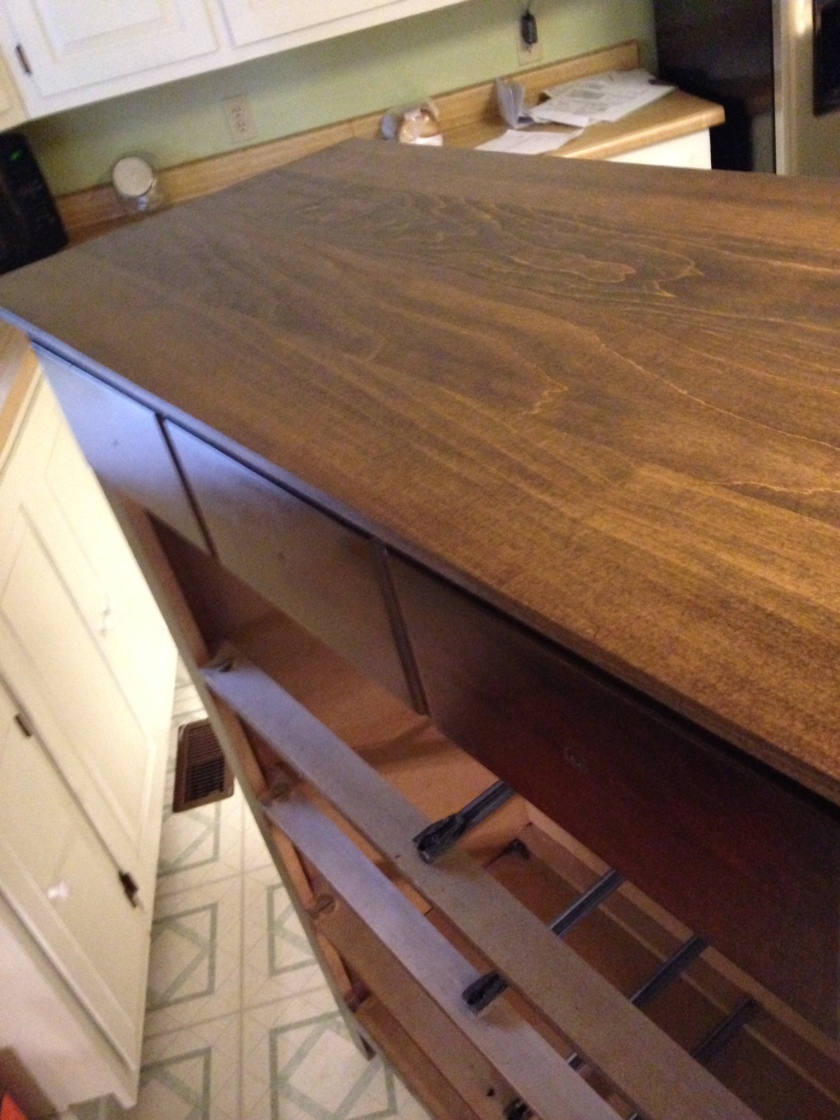
With the living room out of things to repurpose, and paint, it is on to the bedroom. The furniture is a little over ten years old. It’s still nice but has some wear, so we decided to get the ‘ol orbital sander out to see if stain was an option to make it beautiful again. Low and behold, it looked fantastic. Forty-five minutes later (and a few odd stares from the neighbors) I had a wonderful top to stain. I decided to use Dark Walnut stain by Winwax. I LOVE this stain. It really brings out the grain in the wood, and looks so pretty once the poly is on it. Then I mixed my handy dandy chalk paint with non-sanded grout (recipe here). I used the color Anvil from Home Depot (I believe the Martha Stewart collection). We absolutely LOVE IT! There is not a bit of distressing on it just paste wax. I prefer to use paste wax, it is a bit softer than finishing wax. It is easier to use on the …
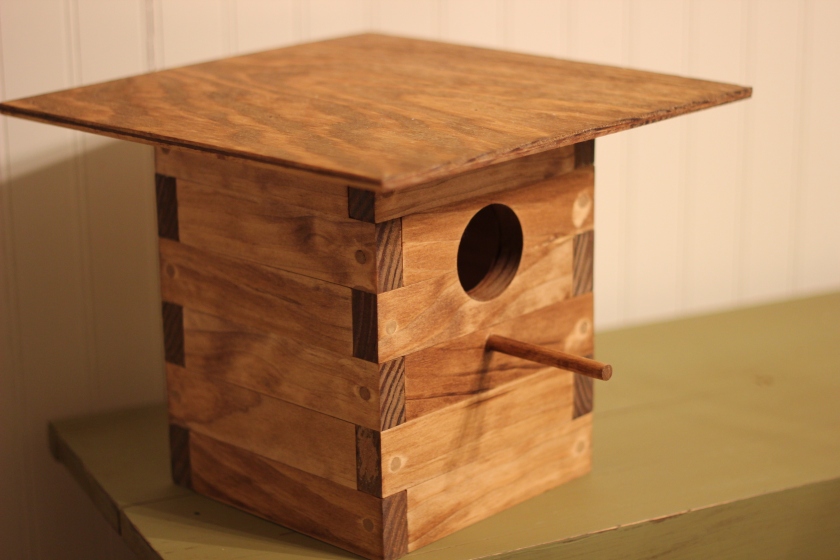
I have been wanting to build a bird house from scratch for a while now. Last year we bought a kit from Lowe’s Home Improvement, and it was so much fun for the whole family. This time though, we decided to design our own. After measuring out the size we wanted the bird house to be, I cut the boards the exact same length. I used pine for this project, since we are using 1×2 inch wood. Using hardwood could really drive up the price of materials. We then painstakingly glued the boards together, alternating grain direction. After everything was glued up, I screwed each board to the next. I drilled a hole for the entrance, installed a dowel for the perch. I used some left over plywood for the top and bottom, and attached them with pocket holes. Then I filled the screw holes with wood filler, and sanded. After a couple coats of Minwax stain, we were finished. In hindsight, I will probably use brads to join the wood together. The screws were …
